ARKit by Example — Part 4: Realism - Lighting & PBR
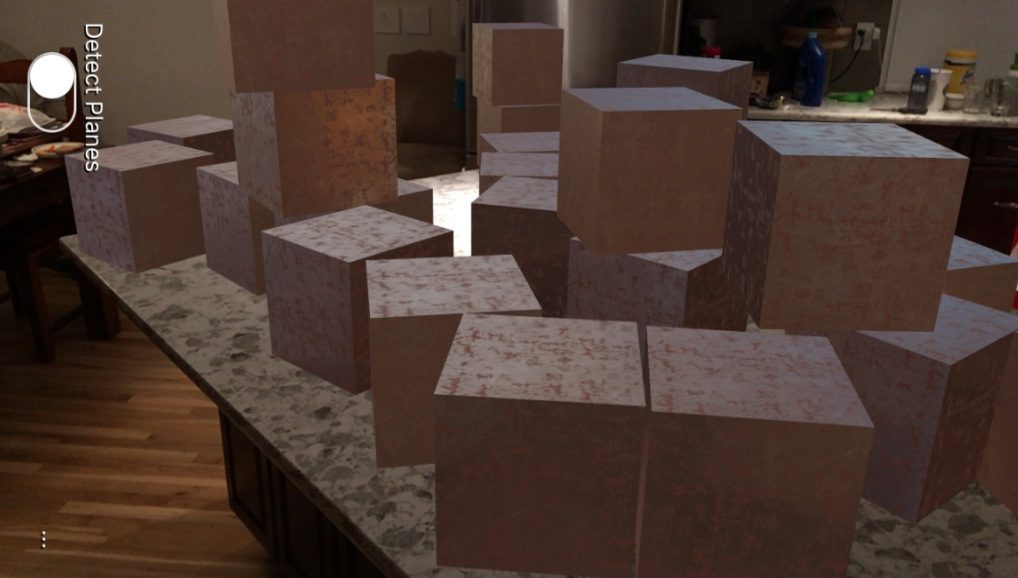
In this article we are going to insert more realistic looking virtual content in to the scene. We can achieve this by using more detailed models using a technique called Physically Based Rendering (PBR) and also a more accurate representation of lighting in the scene.
To see the updates, check out the video below, instead of just plane solid boring cubes we now have added some PBR based materials that give us a much more realistic object that seems to fit into the real world, with variable lighting and reflections.
If you haven’t read the other articles in the series, you can find a list here.
Scene Lighting
One of the main aims of Augmented Reality is to mix virtual content with the real world. Sometimes the content we add may be stylized and not look “real” but other times we want to insert content that looks and feels like it is part of the actual space we are interacting with.
Intensity
In order to achieve a high level of realism, lighting the scene is very important. Trying to model the real-world lighting as closely as possible in the virtual scene will make content you insert feel more real.
For example, if you are in a dimly lit room and insert a 3D model which is lit using a bright light it’s going to look totally out of place and vice versa, a dimly lit 3D object in a bright room is going to feel out of place.
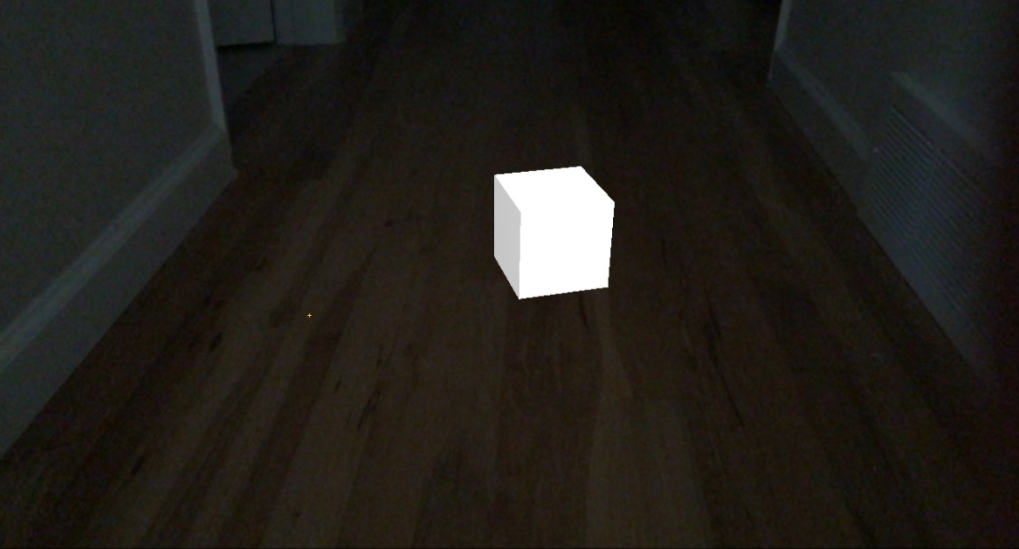
A brightly lit cube in a dark environment — feels totally out of place
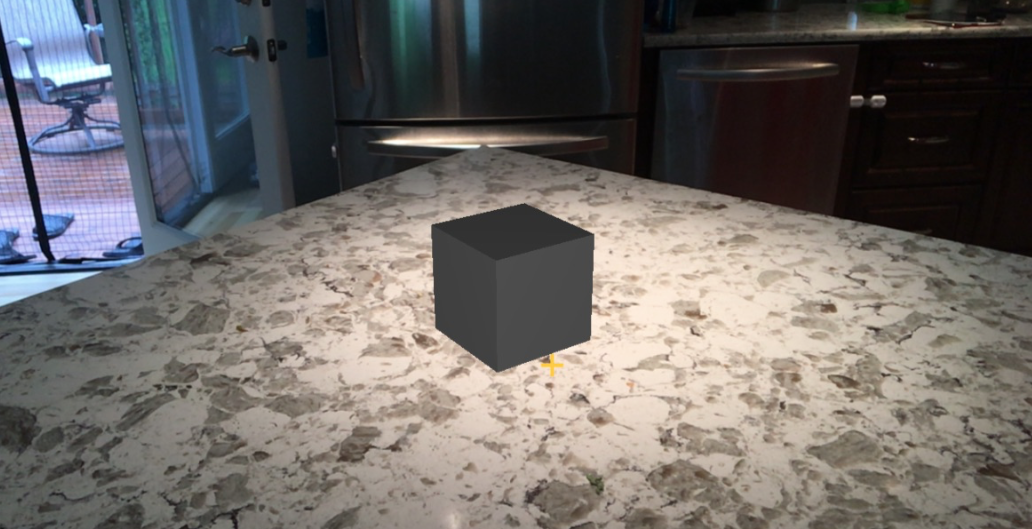
A dark cube in a brightly lit location (also the direction of the light is off)
So let’s start from the beginning and build up to higher and higher levels of realism. First, if your virtual scene has no lights, then just as in the real world all of the content will be black, there is no light to reflect of the object surfaces. If we turn off the lights in our scene and insert some cubes you will see the following result:
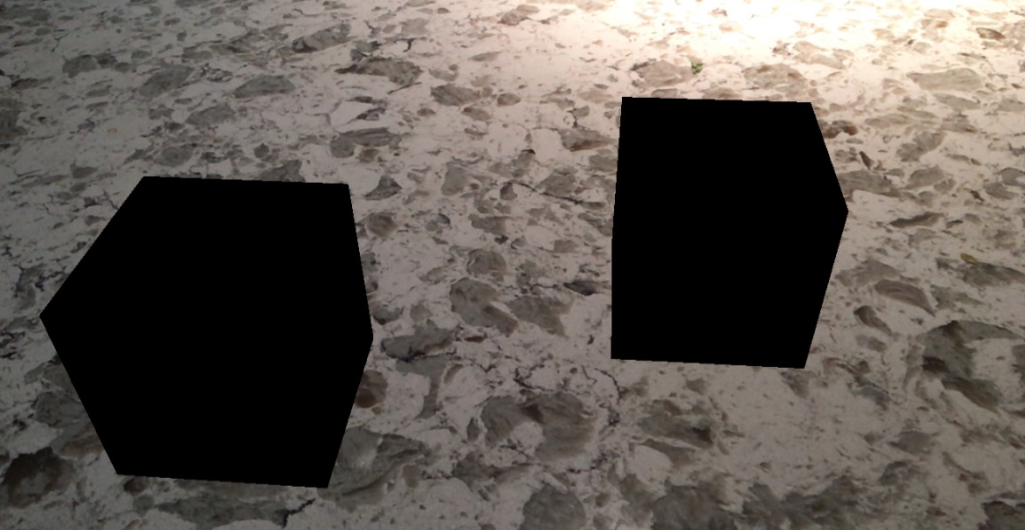
Two virtual cubes on a real world surface, without any lighting in the scene
Now we need to add some lights to our scene, in 3D graphics there are various different kinds of lights you can add to a scene:
 Examples of different lighting modes — SceneKit
Ambient — simulates an equal amount of light hitting the object from all directions. As you can see since light hits the object equally from every direction there are no shadows.
Directional — directional light has a direction but no source location, just imagine an infinite place emitting light from the surface.
Omni — also known as a spot light. This is a light that has direction (like directional) but also a position. This is useful if you want to perform calculations like how intense the light is based on the distance of the geometry from the light source.
Spot — spot light is like omni, but as well as direction and position, a spot light falls off in intensity in a cone shape, just like a spot light on your desk. There are some other types of lights but we don’t need to use those right now, for more info you can read the SceneKit documentation for SCNLight.
autoenablesDefaultLighting
SceneKit SCNView has a property called autoenablesDefaultLighting if you set this to true, SceneKit will add an Onmi directional light to the scene, located from the position of the camera and pointing in the direction of the camera, this is a good starting point and it is enabled by default on your project (that is what has been lighting all the cubes in the previous articles in this series) until you add your own light sources. A couple of problems with this easy settings are:
The intensity of the light is always 1000 which means “normal” so again placing content in different lighting situations will not look right.
The light has a changing direction, so as you walk around an object it will always look like the light is coming from your point of view (like you are holding a torch infront of you) which isn’t the case normally, most scenes have static lighting so your model will look unnatural as you move around.
We are going to turn this off for our app:
self.sceneView.autoenablesDefaultLighting = NO;
automaticallyUpdatesLighting
ARKit’s ARSCNView has a property called automaticallyUpdatesLighting which the documentation says will automatically add lights to the scene based on the estimated light intensity. Sounds great, but as far as I can tell it does nothing, setting this in various combinations with other properties didn’t seem to do anything, not sure if it is a bug in this release of the SDK or if I am doing something wrong (more likely), but it doesn’t matter since we can get estimated lighting another way which we will do now.
lightEstimationEnabled
The ARSessionConfiguration class has a lightEstimationEnabled property, setting this to true, inside every captured ARFrame, we will get a lightEstimate value that we can use to render the scene. With this information we can take the lightEstimate every frame and modify the intensity of the lights in our scene to mimic the ambient light intensity of the real world scene which helps the too bright/ too dim issue mentioned above.
Lighting
First let’s add a light to the scene, we will add a spot light that is pointing directly down and insert it into the scene a few meters above the origin. This roughly simulates the environment I am in making the videos in my house where I have spot lights in the ceiling. To add a spot light you:
- (void)insertSpotLight:(SCNVector3)position {
  SCNLight *spotLight = [SCNLight light];
  spotLight.type = SCNLightTypeSpot;
  spotLight.spotInnerAngle = 45;
  spotLight.spotOuterAngle = 45;
  SCNNode *spotNode = [SCNNode new];
  spotNode.light = spotLight;
  spotNode.position = position;
  // By default the stop light points directly down the negative
  // z-axis, we want to shine it down so rotate 90deg around the
  // x-axis to point it down
  spotNode.eulerAngles = SCNVector3Make(-M_PI / 2, 0, 0);
  [self.sceneView.scene.rootNode addChildNode: spotNode];
}
As well as a spot light we also add an ambient light, this is because in the real world there are usually multiple light sources and light bouncing off wall and other physical objects that provide light to all sides of an object. The process is similar to above, I’ll omit it from here. When we do this we can now insert a piece of geometry and have it feel more like it is actually part of the scene.
Light Estimation
Finally, we mentioned lightEstimation, ARKit can analyze the scene and estimate the ambient light intensity. It will returns a value, 1000 representing “neutral” values below that are darker and values above are brighter. To enable light estimation, you need to set the lightEstimationEnabled property to true in your scene configuration:
configuration.lightEstimationEnabled = YES;
Once you do this, you can then implement the following method in the ARSCNViewDelegate protocol and modify the intensity of the spot light and ambient light we added to the scene:
- (void)renderer:(id <SCNSceneRenderer>)renderer updateAtTime:(NSTimeInterval)time {
  ARLightEstimate *estimate = self.sceneView.session.currentFrame.lightEstimate;
  if (!estimate) {
    return;
  }
  // TODO: Put this on the screen
  NSLog(@"light estimate: %f", estimate.ambientIntensity);
  // Here you can now change the .intensity property of your lights
  // so they respond to the real world environment
}
Now this is very cool, watch the video below, you can see how when I dim down the lights in my house the virtual cube also gets darker as the virtual lights are dimmed! Then it gets brighter as the lights get brighter.
The takeaway from this is that getting the lighting to match the real world is tricky, but we have a useful blunt tool in the form of lighting estimation that can help us with some realism. I think the general guideline here is that ideally you make sure your users are using your app in a well lit environment that has consistent lighting that can be modeled easily.
Physically Based Rendering
Ok, so we have the concept of basic lighting, we will throw 99% of that away :) Instead of trying to add lights to our scene and handle the complexity, we are going to keep the lighting estimation functionality but texture our geometry using a technique called Physically Based Rendering.
Some examples of objects rendered using this technique are shown below:
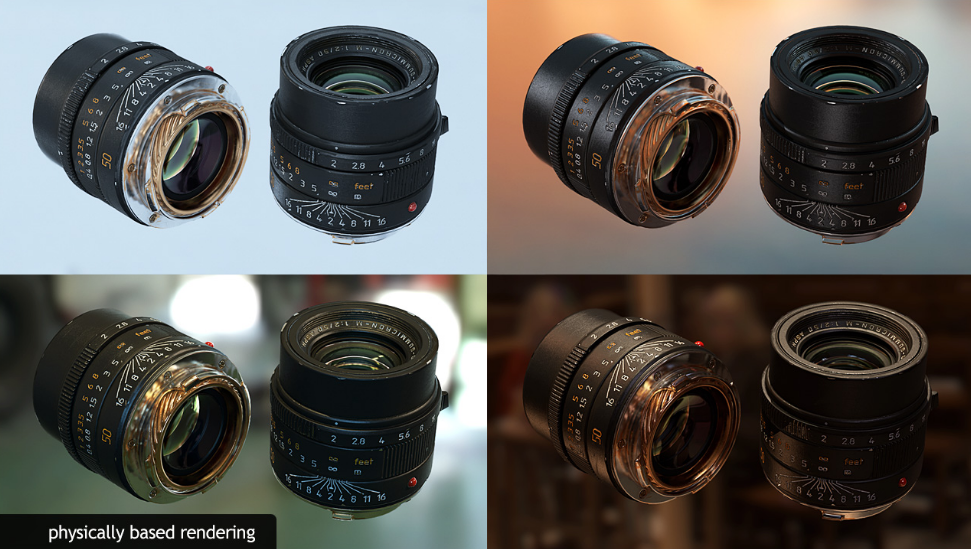
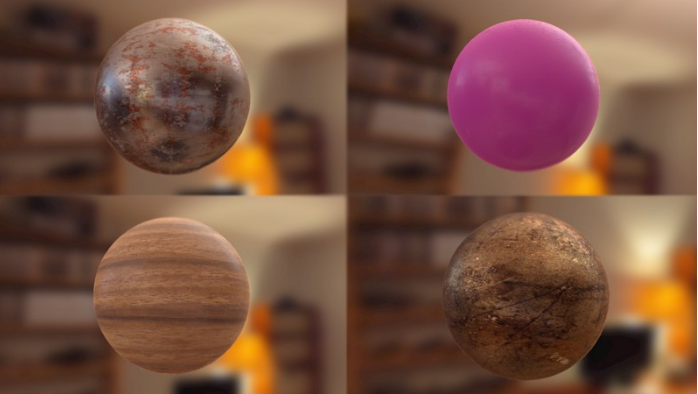
I’m not going to try to explain all the details of this process in this article because there are many excellent resources, but the basic concept is that when you texture your object you provide information that includes:
Albedo — this is the base color of the model. It maps to the diffuse component of your material, it is the material texture without any baked in lighting or shadow information.
Roughness — describes how rough the material will be, the rougher surfaces show dimmer reflections, smoother materials show brighter specular reflections.
Metalness — a rough equivalent to how shiny a material will be.
See https://www.marmoset.co/posts/tag/pbr/page/5/ for a much more detailed explanation.
For our purposes we just want to render our cubes and planes with more realism, for that I grabbed some textures from http://freepbr.com/ and rendered the materials using them:
mat = [SCNMaterial new];
mat.lightingModelName = SCNLightingModelPhysicallyBased;
mat.diffuse.contents = [UIImage imageNamed:@"wood-albedo.png"];
mat.roughness.contents = [UIImage imageNamed:@"wood-roughness.png"];
mat.metalness.contents = [UIImage imageNamed:@"wood-metal.png"];
mat.normal.contents = [UIImage imageNamed:@"wood-normal.png"];
You need to set the lightingModelName of the material to SCNLightingModelPhysicallyBased and set the various material types.
The final important part is that you have to tell your SCNScene you are using PBR lighting, when you do this the light source for the scene actually comes from an image you specify, for example I used this image:
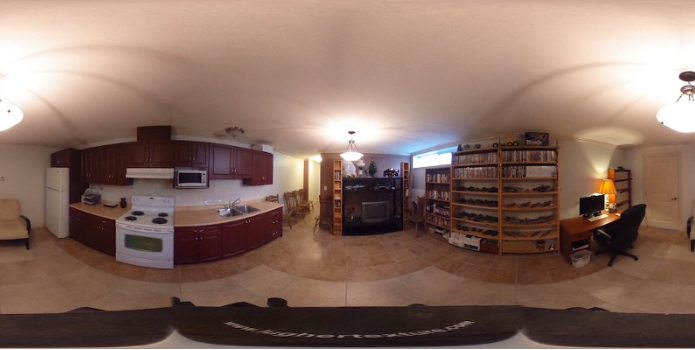
So the lighting of your geometry is taken from this image, think of the image being projected all around the geometry as a background then SceneKit is using this background to figure out how the geometry is being lit.
UIImage *env = [UIImage imageNamed: @"spherical.jpg"];
self.sceneView.scene.lightingEnvironment.contents = env;
The final part is taking the light estimation value we get from ARKit and applying it to the intensity of this environment image. ARKit returns a value of 1000 to represent neutral lighting, so less that that is darker and more is brighter. The lighting environment value takes a value of 1.0 for neutral, so we need to scale the value we get from ARKit:
CGFloat intensity = estimate.ambientIntensity / 1000.0;
self.sceneView.scene.lightingEnvironment.intensity = intensity;
UI Improvements
I changed the UI so now if you press and hold with a single finger on a plane, it will change the material, same for the cubes, press and hold to change the material of the cube. Press and hold with two fingers to cause an explosion.
I also added a toggle to stop plane detection once you are happy with the planes you have found, and a settings screen to turn on/off various debug items.
As always, you can find the code for this project here: https://github.com/markdaws/arkit-by-example
Next
So far we wrote the app assuming the happy path, that nothing will go wrong, but in the real world especially with tracking we know that is not always the case. There are a number of scenarios we need to handle when it comes to ARKit to make our app more robust, in the next article we will take a step back and handle the error and degradation cases.