ARKit By Example — Part 2: Plane Detection + Visualization
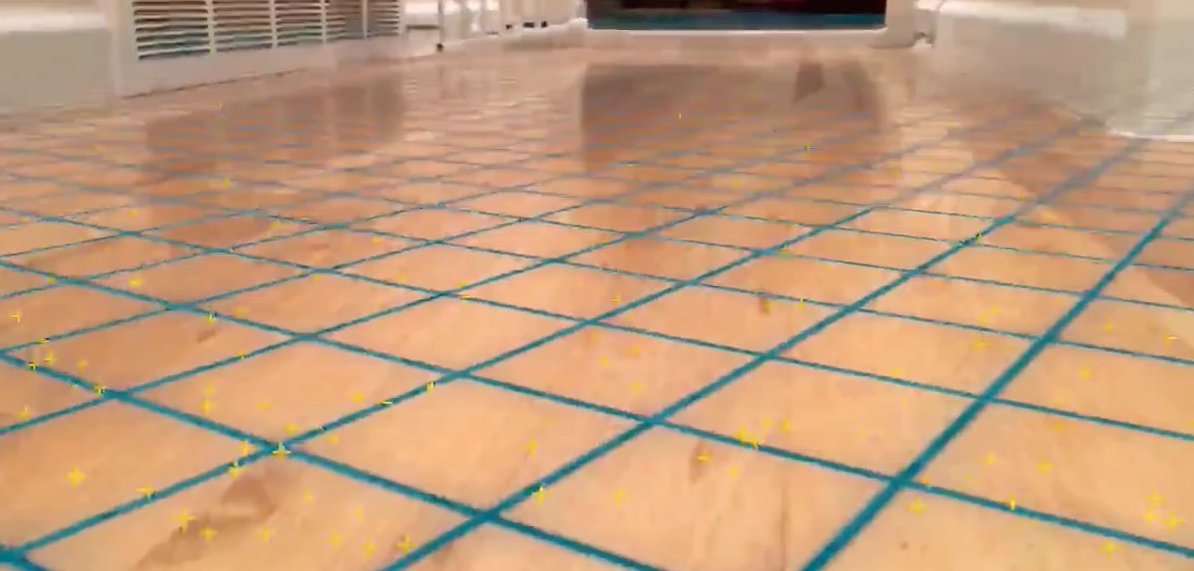
In our first hello world ARKit app we setup our project and rendered a single virtual 3D cube which would render in the real world and track as you moved around. In this article, we will look at extracting 3D geometry from the real world and visualizing it. Detecting geometry is very important for Augmented Reality apps because if you want to be able to feel like you are interacting with the real world you need to know that the user clicked on a table top, or is looking at the floor, or another surface to get life-like 3D interactions. Once we have the plane detection completed in this article, in a future article we will use them to place virtual objects in the real world. ARKit can detect horizontal planes (I suspect in the future ARKit will detect more complex 3D geometry but we will probably have to wait for a depth sensing camera for that, iPhone8 maybe…). Once we detect a plane, we will visualize it to show the scale and orientation of the plane. To see it all in action, watch the video below:
NOTE: It is assumed you are following along from the code located here: https://github.com/markdaws/arkit-by-example/tree/part2
Computer Vision Concepts
Before we dive in to the code, it is useful to know at a high level what’s happening beneath the covers in ARKit, because this technology is not perfect and there are certain situations where it will break down and affect the performance of your app.
The aim of Augmented Reality is to be able to insert virtual content in to the real world at specific points and have that virtual content track as you move around the real world. With ARKit the basic process for this involves reading video frames from the iOS device camera, for each frame the image is processed and feature points are extracted. Features can be many things, but you want to try to detect interesting features in the image that you can track across multiple frames. A feature may be the corner of an object or the edge of a textured piece of fabric etc.
There are many ways to generate these features, you can read more on that across the web (e.g. search for SIFT) but for our purpose it’s enough to know that there are many features extracted per image which can be uniquely identified. Once you have the features for an image, you can then track the features across multiple frames, as the user moves around the world, you can take these corresponding points and estimate 3D pose information, such as the current camera position and the positions of the features. As the user moves around more and we get more and more features, these 3D pose estimations improve.
For plane detection, once you have a number of feature points in 3D you can then try to fit planes to those points and find the best match in terms of scale, orientation and position. ARKit is constantly analyzing the 3D feature points and reporting all the planes it finds back to us in the code.
Below is a screenshot from my phone looking at the arm of my sofa. As you can see the fabric has good texture, plenty of interesting and unique features that can be tracked, each cross is a unique feature found by ARKit.

This next picture is one I took of my fridge door, notice how there are not many points:
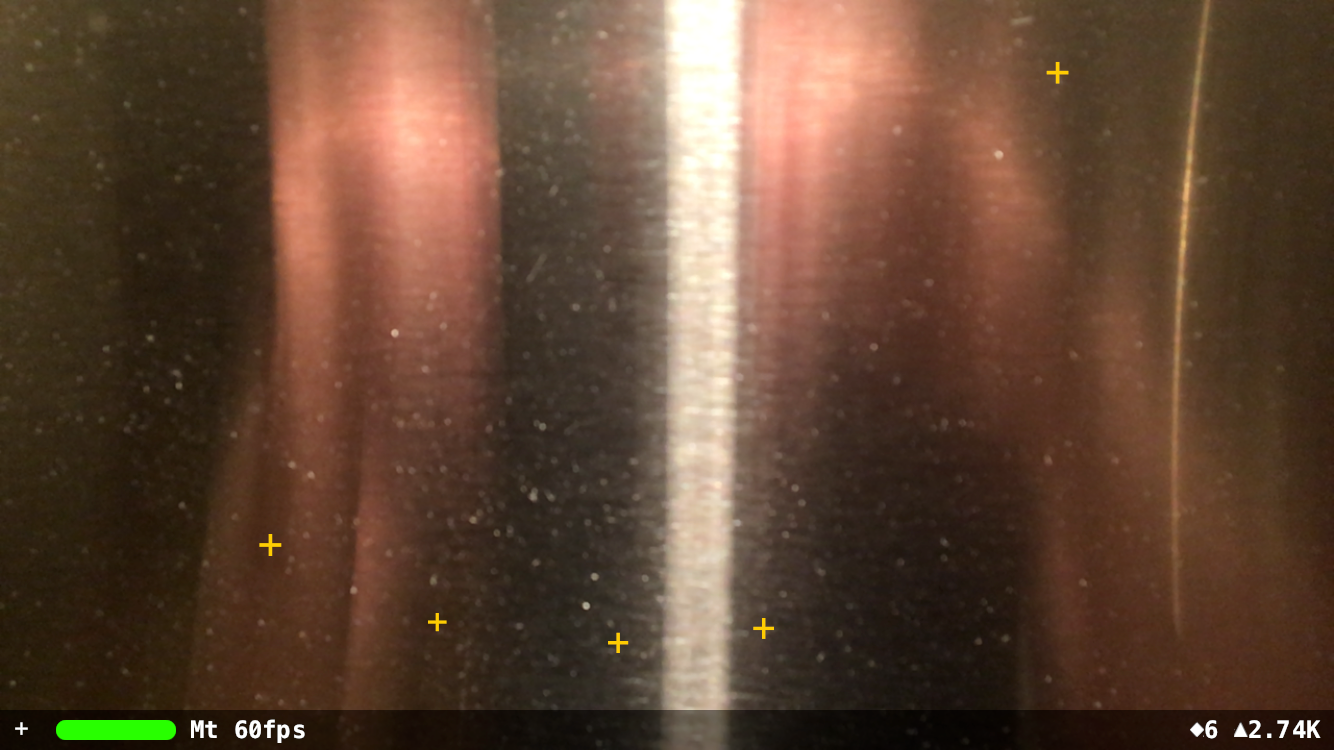
This is important because for ARKit to detect features you have to be looking at content that has lots of interesting features to detect. Things that would cause poor feature extraction are:
Poor lighting — not enough light or too much light with shiny specular highlights. Try and avoid environments with poor lighting.
Lack of texture — if you point your camera at a white wall there is really nothing unique to extract, ARKit won’t be able to find or track you. Try to avoid looking at areas of solid colors, shiny surfaces etc.
Fast movement — this is subjective for ARKit, normally if you are only using images to detect and estimate 3D poses, if you move the camera too fast you will end up with blurry images that will cause tracking to fail. However ARKit uses something called Visual-Inertial Odometry so as well as the image information ARKit uses the devices motion sensors to estimate where the user has turned. This makes ARKit very robust in terms of tracking.
In another article we will test out different environments to see how the tracking performs.
Adding Debug Visualizations
Before we start, it’s useful to add some debugging information to the application, namely rendering the world origin reported from ARKit and then also rendering the feature points ARKit has detected, that will be useful to let you know that you are in an area that is tracking well or not. To do this we can turn on the debug options on our ARSCNView instance:
self.sceneView.debugOptions =
  ARSCNDebugOptionShowWorldOrigin |
  ARSCNDebugOptionShowFeaturePoints;
Detecting plane geometry
In ARKit you can specify that you want to detect horizontal planes by setting the planeDetection property on your session configuration object. This value can be set to either ARPlaneDetectionHorizontal or ARPlaneDetectionNone.
Once you set that property, you will start getting callbacks to delegate methods for the ARSCNViewDelegate protocol. There are a number of methods there, the first we will use is:
/**
Called when a new node has been mapped to the given anchor.
@param renderer The renderer that will render the scene.
@param node The node that maps to the anchor.
@param anchor The added anchor.
*/
- (void)renderer:(id <SCNSceneRenderer>)renderer
      didAddNode:(SCNNode *)node
       forAnchor:(ARAnchor *)anchor {
}
This method gets called each time ARKit detects what it considers to be a new plane. We get two pieces of information, node and anchor.
The SCNNode instance is a SceneKit node that ARKit has created, it has some properties set like the orientation and position, then we get an anchor instance, this tells use more information about the particular anchor that has been found, such as the size and center of the plane.
The anchor instance is actually an ARPlaneAnchor type, from that we can get the extent and center information for the plane.
Rendering the plane
With the above information we can now draw a SceneKit 3D plane in the virtual world. To do this we create a Plane class that inherits from SCNNode. In the constructor method we create the plane and size it accordingly:
// Create the 3D plane geometry with the dimensions reported
// by ARKit in the ARPlaneAnchor instance
self.planeGeometry = [SCNPlane planeWithWidth:anchor.extent.x height:anchor.extent.z];
SCNNode *planeNode = [SCNNode nodeWithGeometry:self.planeGeometry];
// Move the plane to the position reported by ARKit
planeNode.position = SCNVector3Make(anchor.center.x, 0, anchor.center.z);
// Planes in SceneKit are vertical by default so we need to rotate
// 90 degrees to match planes in ARKit
planeNode.transform = SCNMatrix4MakeRotation(-M_PI / 2.0, 1.0, 0.0, 0.0);
// We add the new node to ourself since we inherited from SCNNode
[self addChildNode:planeNode];
Now that we have our Plane class, back in the ARSCNViewDelegate callback method, we can create our new plane when ARKit reports a new Anchor:
- (void)renderer:(id <SCNSceneRenderer>)renderer
      didAddNode:(SCNNode *)node
       forAnchor:(ARAnchor *)anchor {
  if (![anchor isKindOfClass:[ARPlaneAnchor class]]) {
    return;
  }
  Plane *plane = [[Plane alloc] initWithAnchor: (ARPlaneAnchor *)anchor];
  [node addChildNode:plane];
}
NOTE: In the actual code, I also set a grid material on the SCNPlane geometry, to make the visualization look nicer, I have omitted that code here for brevity.
Updating the plane
If you run the above code, as you walk around you will see new planes rendering in the virtual world, however the planes do not grow properly as you move around. ARKit is constantly analyzing the scene and as it finds that a Plane is bigger/smaller than it thought it updates the planes extent values. So we also need to update the Plane SceneKit is already rendering.
We get this updated information from another ARSCNViewDelegate method:
- (void)renderer:(id <SCNSceneRenderer>)renderer
   didUpdateNode:(SCNNode *)node
       forAnchor:(ARAnchor *)anchor {
  // See if this is a plane we are currently rendering
  Plane *plane = [self.planes objectForKey:anchor.identifier];
  if (plane == nil) {
    return;
  }
  [plane update:(ARPlaneAnchor *)anchor];
}
Inside the update method of our Plane class, we then update the width and height of the plane:
- (void)update:(ARPlaneAnchor *)anchor {
  self.planeGeometry.width = anchor.extent.x;
  self.planeGeometry.height = anchor.extent.z;
  // When the plane is first created it's center is 0,0,0 and
  // the nodes transform contains the translation parameters.
  // As the plane is updated the planes translation remains the
  // same but it's center is updated so we need to update the 3D
  // geometry position
  self.position = SCNVector3Make(anchor.center.x, 0, anchor.center.z);
}
Now that we have got the plane rendering and updating, we can take a look in the app. I added a Tron style grid texture to the SCNPlane geometry, I have omitted it here but you can look in the source code.
Extraction Results
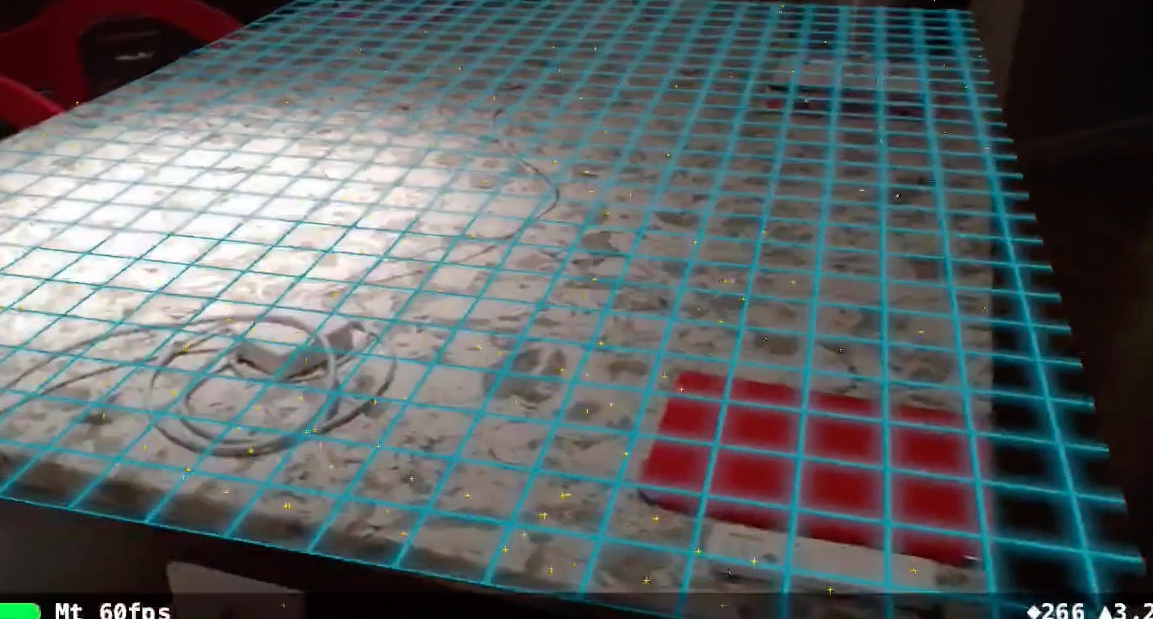
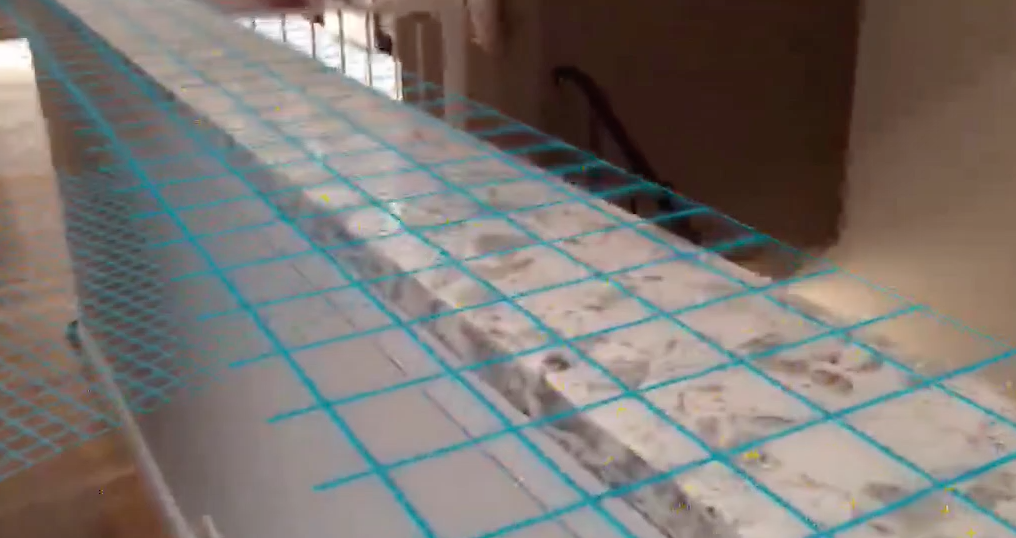
Below are some screen shots of the planes detected from the video above as I walked around part of my house: This is an island in my kitchen, ARKit did a good job finding the extents and orientating the plane correctly to match the raised surface
Here is a shot looking at the floor, as you can see as you move around ARKit is constantly surfacing new planes, this is interesting because if you are developing an app, the user will first have to move around in a space before they can place content, it will be important to provide good visual clues to the user when the geometry is good enough to use.
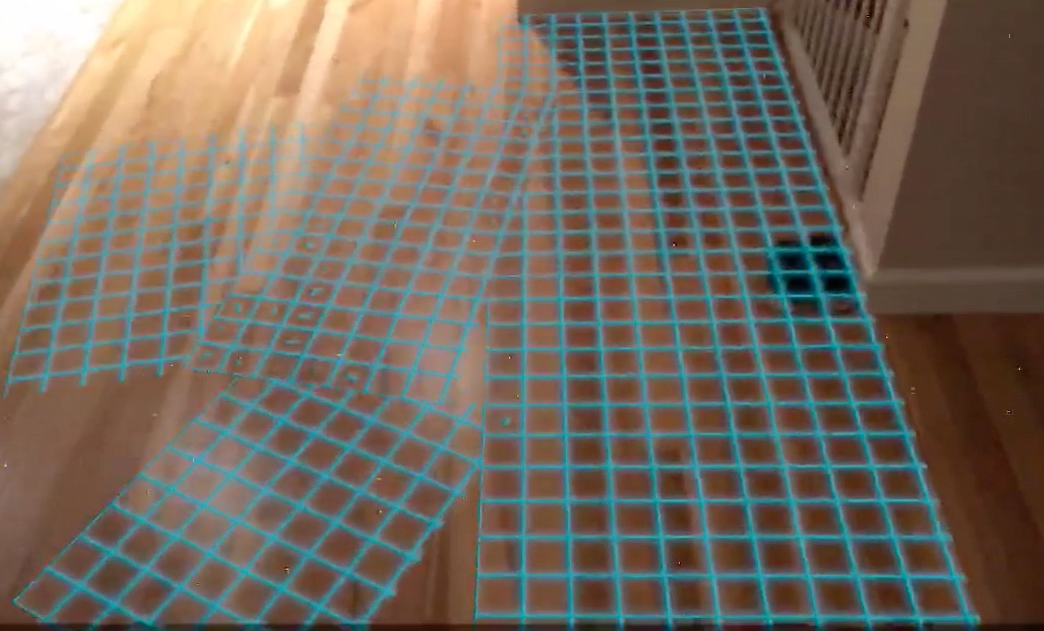
Below is the same scene as above, but a few seconds later, ARKit has merged all of the above planes in to a single plane. Note, that in the ARSCNViewDelegate callbacks you have to handle the case where ARKit has deleted a ARPlaneAnchor instance as planes are merged.
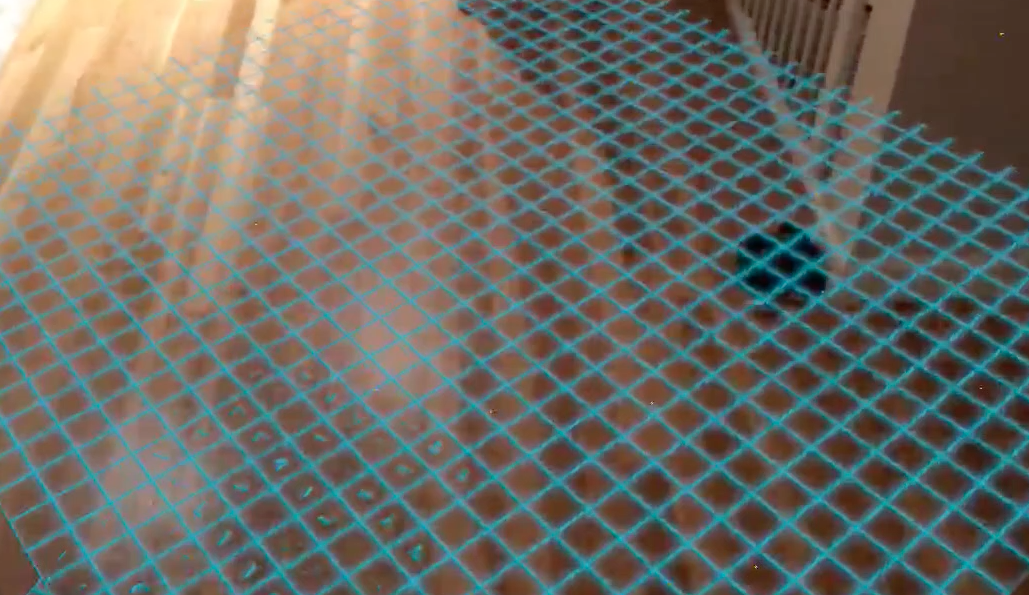
This in interesting because I am standing above this floor, about 12 to 15 feet above it, in poor lighting conditions and ARKit still managed to extract a plane at that distance, impressive!
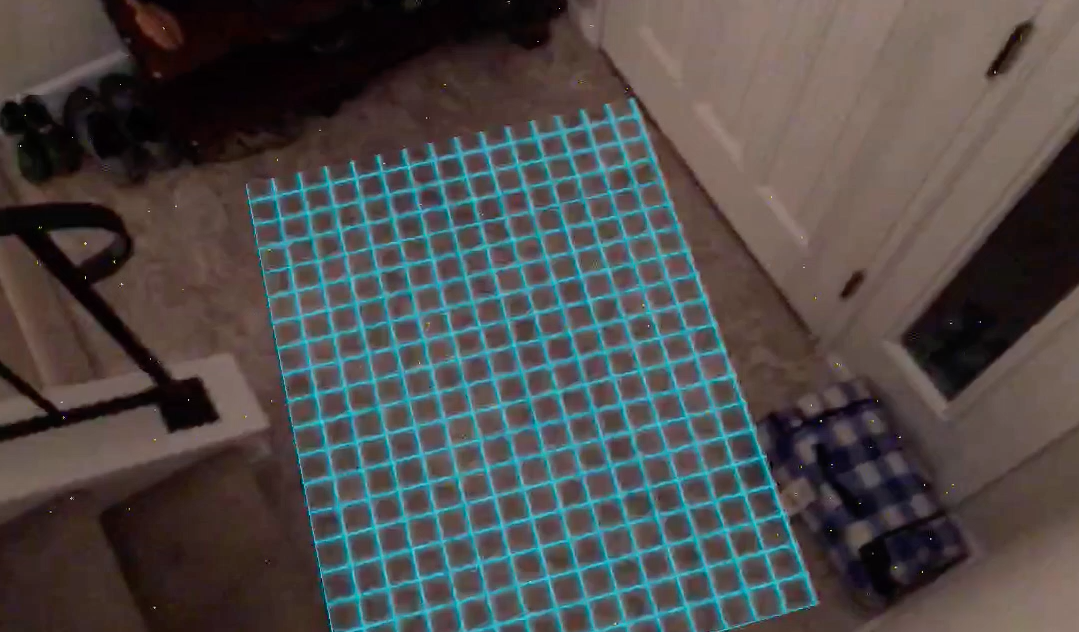
Here is a plane extracted on top of a small wall next to the stairs. Notice how the plane extends past the edge of the actual surface.
Recognition takeaways
Here are some points I found from plane detection:
Don’t expect a plane to align perfectly to a surface, as you can see from the video, planes are detected but the orientation might be off, so if you are developing an AR app that wants to get the geometry really accurate for a good effect you might be disappointed.
Edges are not great, as well as alignment the actual extend of the planes is sometimes too small or large, don’t try to make an app that requires perfect alignment
Tracking is really robust and fast. As you can see as I walk around the planes track to the real world really well, I’m moving the camera pretty fast and it still looks great
I was impressed by the feature extraction, even in low light and from a distance of about 12–15 feet away ARKit still extracted some planes.
Next
In the next article we will use the planes to start placing 3D objects in the real world and also look more into robustification of the app.